Expert Review of ZW3D 2019
|
|
March 19, 2019
ZWSOFT, a reliable and innovative engineering software provider, has recently announced the launch of ZW3D 2019, delivering improvements from design to manufacturing, which can help users bring complex products to the market faster. To help you better understand the new release, we invite Jeffrey Rowe, who has more than 40 years of experience in industrial design, mechanical engineering, and manufacturing, to try ZW3D 2019 and share his hands-on review. In the first part, he will share the CAD module of ZW3D 2019. Without further ado, let's see how he evaluates it: Overview It’s no secret that there are many engineering software choices for computer-aided design (CAD) and computer-aided manufacturing (CAM), but they are often separate products or add-ins. ZW3D, however, provides CAD and CAM capabilities in a single, integrated package and interface that can really streamline the product development process. ZW3D 2019 Premium, with its ability to handle both CAD and CAM, has several advantages. The biggest advantage is a friendly user interface. You can easily move between the CAD and CAM environments for a smoother and more efficient design, engineering and manufacturing workflow, which can provide better outcomes and results. ZW3D 2019 is available in several versions with each offering features for users with different needs. ZW3D 2019 Premium is the version that will be covered in this evaluation/review. Please note, although ZW3D Premium has a range of CAD and CAM capabilities, I am focusing primarily on the CAD side in this part. I will, cover some of the new operations available for CAM in the next part.
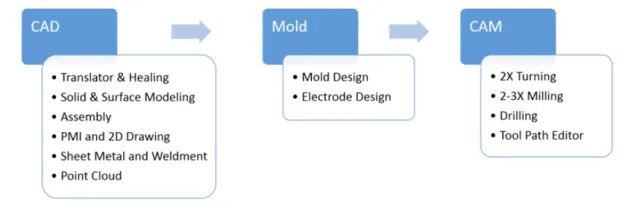
Figure 1. ZW3D Premium Capabilities (Image Courtesy of
ZWSOFT.) • Comprehensive import capabilities • History-based and direct modeling • Solid surface hybrid modeling • Assembly design • Sheet metal design • 2D drawings • Mold design • Point cloud processing • Integrated manufacturing and machining capabilities, hole machining, 2- and 3-axis milling, and lathe turning • Integrated PartSolutions library Getting Started 1. Before installing ZW3D, I recommend that you check your video driver to ensure that it is the most current. I encountered some display issues with ZW3D 2019 until I installed the latest driver for my NVIDIA graphics card. Then, all was well, and I could get to work. 2. For new and even experienced users, the place to start learning ZW3D 2019 is the Show-n-Tell tutorials. ZW3D 2019 also has a series of helpful CAD and CAM tips for just about all aspects of the design and manufacturing processes. 3. A good user interface is vital for new users and minimizing the learning curve, and ZW3D 2019 has made some significant strides in this area. However, the documentation that comes with the product is incomplete and will leave some users, including me, at a loss on how to perform some functions without trial and error. 4. Files created with ZW3D can contain as many parts, assemblies, drawings and CAM plans as required, each being known as an object. You can store an entire project’s objects in one file or multiple files. With this in mind, a good practice is to store commonly used parts in one project file and create part objects specific to an assembly in another project file. 5. Another good practice for beginning a design with ZW3D is to create template objects for modeling, 2D drawing and machining. All template objects are stored in the templates file. You can edit previous template objects, as well as copy and paste to create a new one. Templates can be customized to set such things as colors and line styles, layer schemes, and machining operations and parameters. A template can be selected and used when starting, for example, a new part, drawing sheet or CAM plan. When using templates, be sure to properly save and close the Templates file when you have finished editing to ensure the integrity of your work. 6. ZW3D 2019 has hints and prompts as design aids that most users will appreciate. First, there is Show Hints, which provides context sensitive, continuous tips. Second, at the bottom of the graphics window is the Prompt/Status Line that displays the current command and next logical step ZW3D wants you to perform. This latter feature is not perfect but is usually quite helpful. 7. Like virtually all CAD systems, including ZW3D, most new designs start with sketches. However, ZW3D simplifies sketching using a proprietary capability called Ready Sketch and sketch block with several pre-defined commonly used dimensioned geometric sketch shapes—such as circles, polygons, curves, etc.—that can be quickly edited to a size required for a design. CAD Module: 1. Data Manager I feel ZW3D’s Data Manager is one of the most unique features of ZW3D’s UI. It is used to control several aspects of parts, drawings, the CAM plans, etc. through Levels.
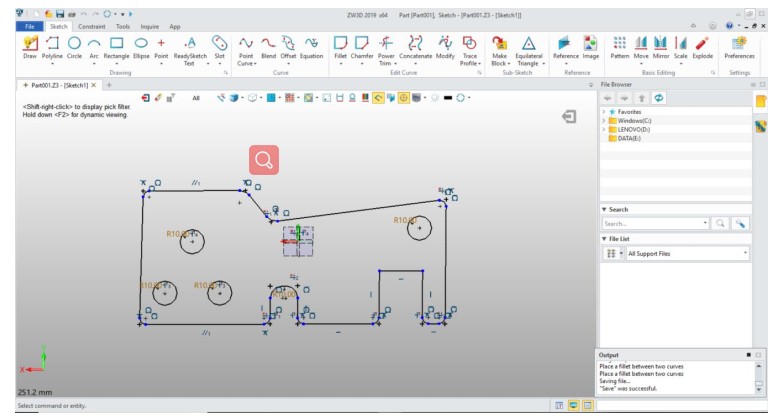
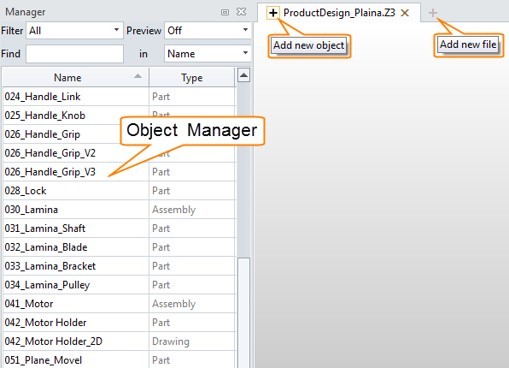
Figure 2. User Interface of ZW3D 2019 Premium in Sketch Mode The Data Manager can be used at the following ZW3D Levels: File/Object Level – The ZW3D Object Manager lists the root objects, such as parts, drawing packets, drawing sheets, root sketches and CAM process plans in the active ZW3D file.Part/Sketch Level – Use the History Manager to view the feature history of an active sketch or part in a graphical tree structure. It can also be used to select features as direct input to many commands and execute history-based commands. The lower portion of the manager contains a list of history-based commands that you can select to execute.
Figure 3. The Object Manager The Layer Manager is accessed from the ZW3D Data Manager, where entities can be assigned to different layers to help manage design data. For example, reference geometry can be assigned to a different layer than part geometry. Layers can be created, edited, deleted, blanked, activated and frozen. You can set default line and face attributes for a layer, and new entities will automatically be assigned those attributes.
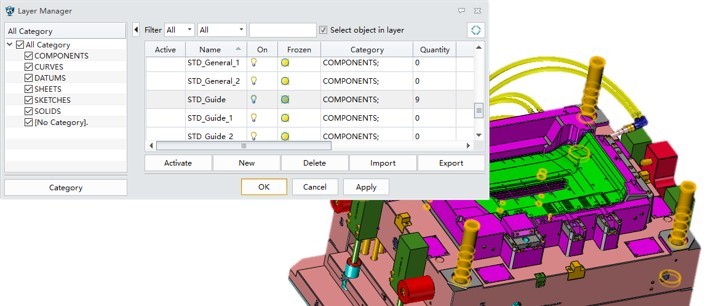
Figure 4. The Layer Manager The Input Manager provides a method of entering required and optional inputs. Options Forms are displayed in the ZW3D Data Manager if it is enabled. You can use the ZW3D Configuration Form to have forms displayed automatically. The forms complement the command prompt sequence. When the forms are not displayed, this is referred to as “streamlined mode” verses “play mode” when they are displayed. In streamlined mode, optional inputs are assigned default values. Only the required inputs are prompted. 2. Dual Modeling Although this capability is not exactly new or unique anymore, since many CAD vendors offer it, direct editing continues to be a hot topic. Like some competitors, ZW3D provides two modeling methods—history-based and direct editing (DE)—that together provide a dual approach for modeling. History-based modeling employs a History Manager, or what other parametric system vendors call a history/feature tree.
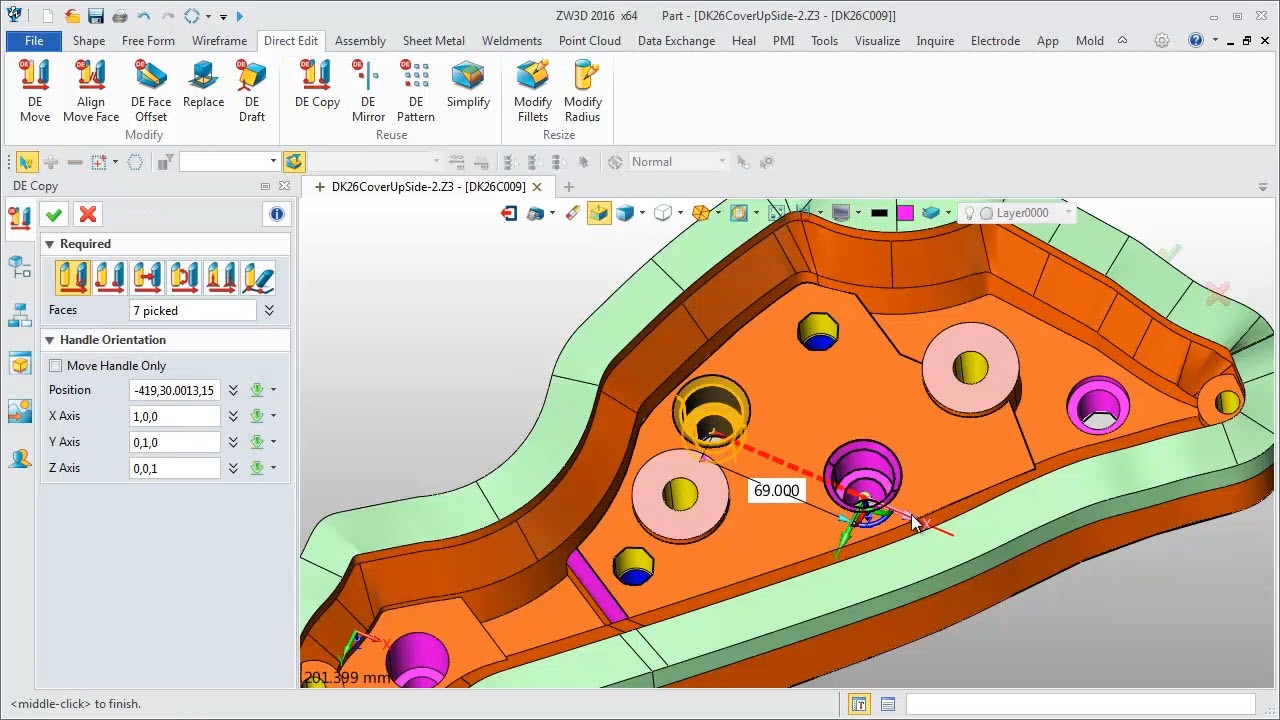
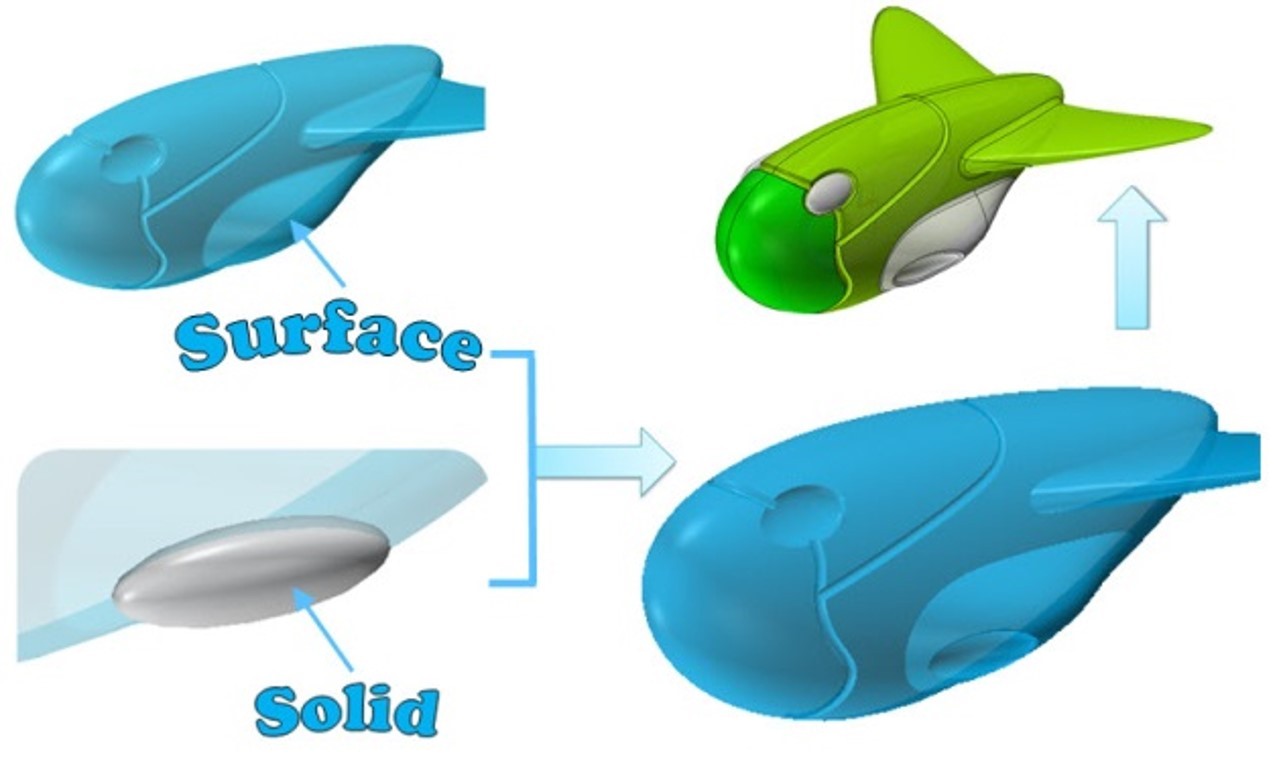
Figure 5. The Direct Edit Function The direct editing approach provided by ZW3D is unique because of the way it employs a feature tree. While some competitors have abandoned the feature tree with their direct approaches, it does provide a workflow that is sometimes easier to track and understand. Direct model editing lets you pick directly on geometry for quick modifications. You also have different options for viewing how the model was created with the ability to display the history of modeling operations, a list of parent and/or child operations, as well as the ability to replay and step through a model’s history. 3. Hybrid Modeling While this capability is hardly unique anymore, ZW3D lets users
work with solids (closed geometry) and surfaces (open geometry)
simultaneously by transferring model data from a solid to a surface
by erasing a face of a closed solid model and making it an open
surface model. You actually use a solid feature to cut surface
geometry to obtain a surface and then add additional features, such
as holes, for a finished part because solid features also work for
surfaces. As with any hybrid modeler, design speed and efficiency
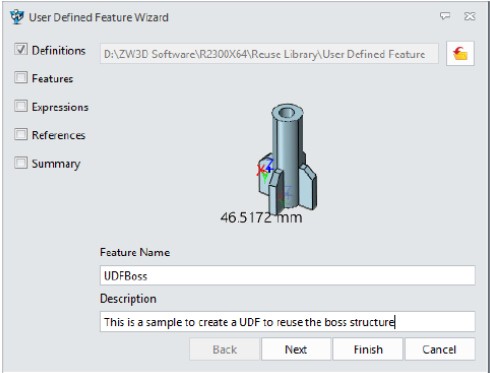
are the main benefits. Figure 6. Hybrid Modeling 4. User-defined Features Thanks to a User Defined Feature (UDF) Wizard, these are features that let you customize and reuse common feature sets for streamlining design practices. The advantages of these features include simplifying model history, achieving company standard design practices, reducing repetitive operations and managing feature sets as libraries. The UDF wizard manages groups of features, associated dimensions and feature relations. It can be used as the feature library to reuse the size, shape and orientation of the reused design element.
Figure 7. User-defined Feature 5. Quick Rollback History This is a new option for ZW3D for increasing design efficiency by speeding up design history (feature) redefinition, resulting in time savings of up to, according to the company, 90 percent compared with previous ZW3D versions. This new functionality was added to speed up previous history
rollback during design redefinition. After enabling the history
quick rollback option, there is a cache file that saves the data of
each modeling feature. When a feature redefinition or rollback takes
place, corresponding feature data will be fetched to restore the
modeling field as it was created. This avoids the regeneration of
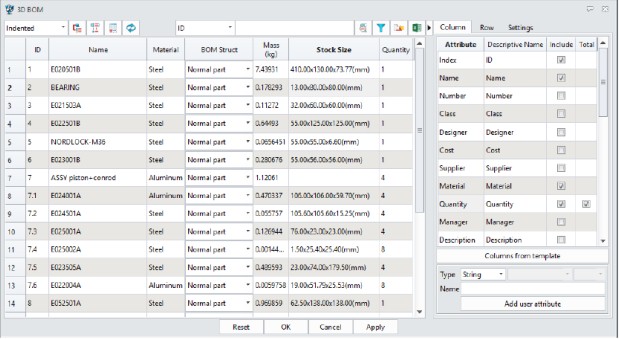
modeling features before the redefining Since there is no rollback data for those features, when component features are included in the feature rollback list, a full regeneration will take place as a previous version to restore the model. Rollback data file is saved on the specified folder independently with a model’s Z3 file—ZW3D’s default file format. 6. 3D BOM ZW3D Premium supports the two main assembly creation approaches: bottom-up and top-down. ZW3D 2019 provides efficient assembly definition, manipulation and management, and was a fundamental consideration when the ZW3D architecture was originally conceived and designed. For example, ZW3D’s Object Manager loads only display data for an object into memory if that object is active for edit, minimizing an assembly’s memory footprint while maximizing the size of an assembly that can be worked with. The Object Manager also lets you decide how assemblies are distributed into files, ranging from each component in a separate file to an entire assembly in one file or anything in between. The 3D BOM is a new capability for ZW3D 2019 with search and editing tools that support part, shape and assembly modes and standards, allowing user-defined attributes to be defined, managed and calculated. The 3D BOM replaces the old Parts List and uses a spreadsheet to provide all assembly component information. Templates and attributes can be defined and reused, and BOM data can be exported as Excel files, so different design models can generate BOM tables with the same format.
Figure 8. ZW3D 3D BOM 7. Flexible Sub-assembly In ZW3D 2019, the mechanical structure of an assembly can be disassociated, making it possible to move individual components for verifying the motion of an entire assembly. It’s easier to verify the motion of a whole assembly to reduce errors with flexible sub-assembly updates. A normal sub-assembly is inserted into an assembly as one rigid component. Its own parts can’t move around each other under the assembly context, no matter if those parts have or do not have any degrees of freedom (DOFs) remaining. The flexible sub-assembly is treated as a movable component. Its own parts can move around under the assembly structure if those parts have DOFs. You can toggle a rigid sub-assembly into a flexible one with the “Make Flexible” command. “Make Rigid” is also available when the flexibility is not desired from a sub-assembly. When a flexible assembly is transformed back into a rigid one, the assembly may become over-constrained because its own parts are not movable. In this case, you will need to manually resolve each issue, such as disabling some of the constraints, which can be quite time consuming, so proceed cautiously.
Figure 9. ZW3D Flexible Sub-assembly 8. Translator Though not a new feature, it is worth mentioning that ZW3D 2019 includes substantial translator compatibility. For example, ZW3D 2019 can read product and manufacturing information (PMI) data from a number of software packages, including CATIA V5 and V6, NX, Creo and SOLIDWORKS. All of the above content are from the review on ZW3D CAD by Jeffrey Rowe. In the next part of Jeffrey Rowe's review, he will share his idea on ZW3D CAM. Expert Review of ZW3D 2019 Part Two - CAM Module
If you would like to try ZW3D please download for a 30 day evaluation If you would like more information or to download ZW3D . Give me a call if you have any questions. I can set up a skype or go to meeting to show this part or answer any of your questions on the operation of ZW3D. It truly is the Ultimate CAD/CAM System.
TECH-NET Engineering Services! Why TECH-NET Sells IronCAD and ZW3D If you are interested in adding professional hybrid modeling capabilities or looking for a new solution to increase your productivity, take some time to download a fully functional 30 day evaluation and play with these packages. Feel free to give me a call if you have any questions or would like an on-line presentation. |
TECH-NET ASSOCIATES | RENDERING OF THE MONTH | CAD•CAM SERVICES
HARDWARE | TECH TIPS | EMPLOYMENT | CONTACT
